Advertising on Facebook for REALTORS ®: One of my favorite parts of working at Rector Hayden REALTORS® is teaching my Integrated Marketing class at the end of each month. One, it gets me out of my comfort zone of hiding behind my computer and puts me in front of a ton of my agents – but it also helps me gauge what tools and info REALTORS need to really make their business shine!
Advertising on Facebook for REALTORS ®
Boosting a Post
The easiest and least complex advertising strategy on Facebook for a REALTOR® is to boost a post. Facebook generously simplifies the advertising campaign process with a convenient action button located on all of your posts on your business page. Your posts on your facebook business page organically reach 17% of your fans (source: Facebook for Business). Organic reach is based on EdgeRank ( if you want to try to learn more about EdgeRank, be my guest: http://edgerank.net/). It boils down to three questions:
- Does your page share original content?
- Do you post frequently?
- Do your fans engage in your content?
If you can answer yes to those questions, then your EdgeRank score is higher. The better you manage each of those 3 situations, the better your score, the more organic reach your content has to your fans, the less money you have to invest relative to your gain.
You can boost your posts to increase reach beyond organic. Facebook also calls this strategy “Sponsored Stories.” It’s where you post comes up in a user’s news feed with the small “Sponsored” tag underneath your name. To do this, you’ll only need to click on the Boost Post action button and follow the prompts. It really is that simple!
If you google “How to Boost a Post on Facebook” google even gives you a quick 3 step guide.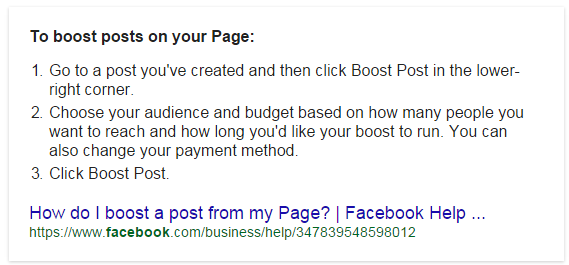
Q: How much does it cost?
A: Facebook advertising can be done at as little as $1 per day!! And, you can change your budget or cancel your ad at any time. There’s no commitment.
Ready to get started? Check out this little mini-video to walk you through it.
 |
STEP 1 SELECTING THE POSTLocate the post that you wish to increase engagement with and click the blue Boost Post button. The post must be made using a Facebook Business page – it cannot be a post from your personal profile or a page you don’t have admin rights to. |
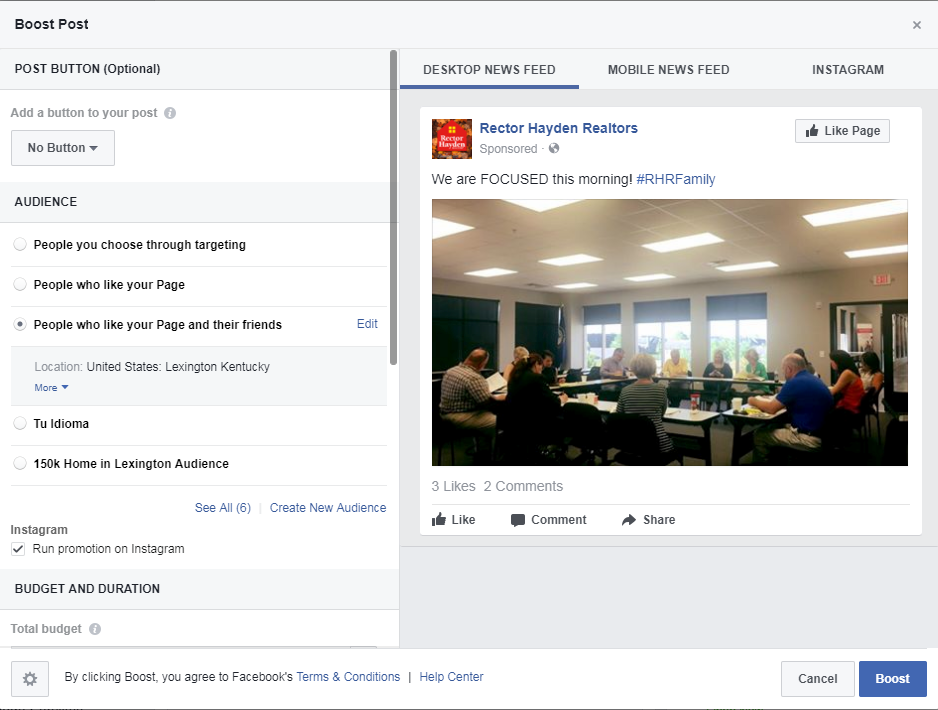 |
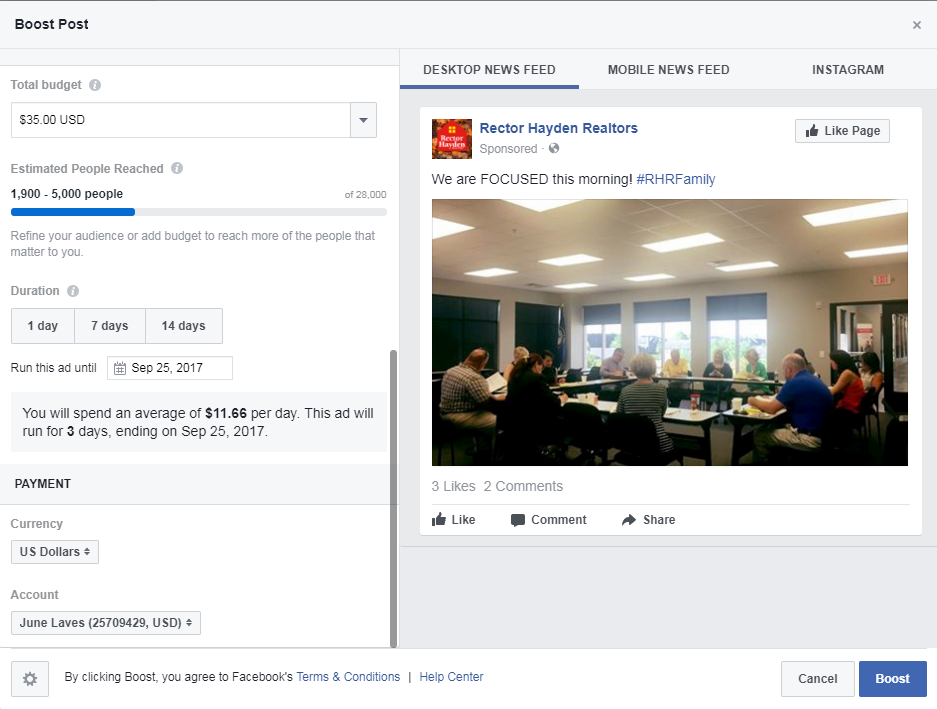
STEP 2 SETTING UP THE BOOSTA pop up menu will show on screen with the different options available to boost your post on the left – and a preview window on the right. In the preview window, you can toggle across three tabs to see how your ad will look on Facebook on a Desktop, Facebook on a Mobile Device, and Instagram. |
 |
STEP 3 POST BUTTON (Optional)You can customize your sponsored post with an additional call-to-action button. Only use this option if the call-to-action button would match your goals. For example, if you wanted to boost a post about a listing, you may want to add the button that says “Learn More” and tell it to link to the listing on your website. But, if you wanted to boost something inviting people to like your page, then you wouldn’t want a call-to-action that connects to something out. |
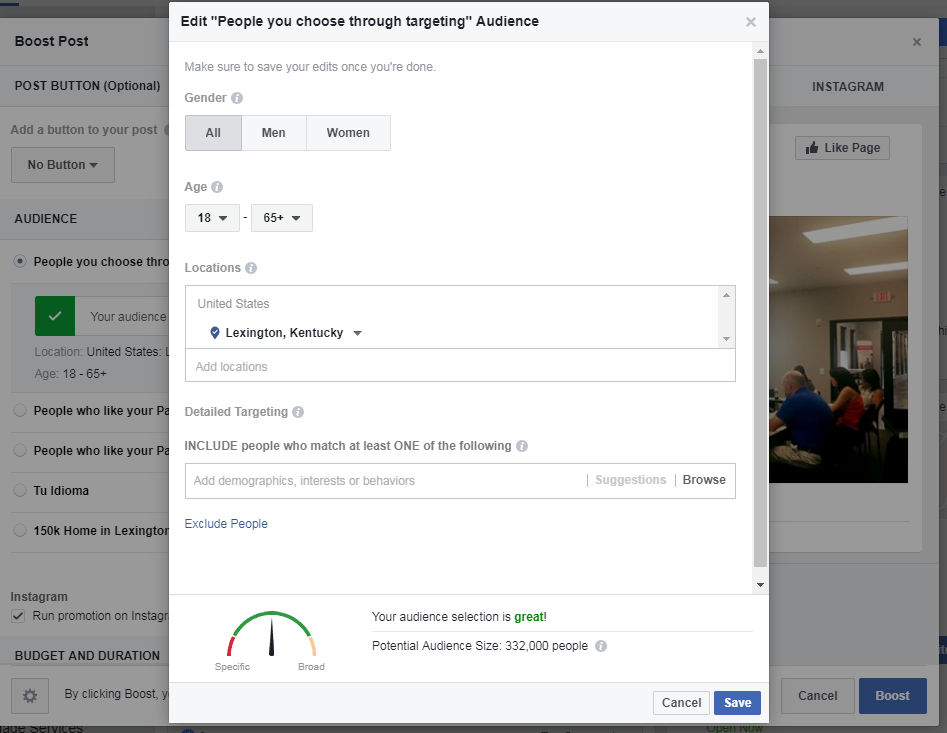 |
STEP 4a CHOOSE YOUR AUDIENCEIn the AUDIENCE section, select the radio button next to “People You Choose Through Targeting” and then click the blue EDIT link to the right. In this part, you want to help choose the best audience that would benefit from viewing your content. You can select gender, age range, and location as well as further detailed targeting specifics if you need. The sample screenshot above shows both men and women, 18 years and older, who are in Lexington, KY. |
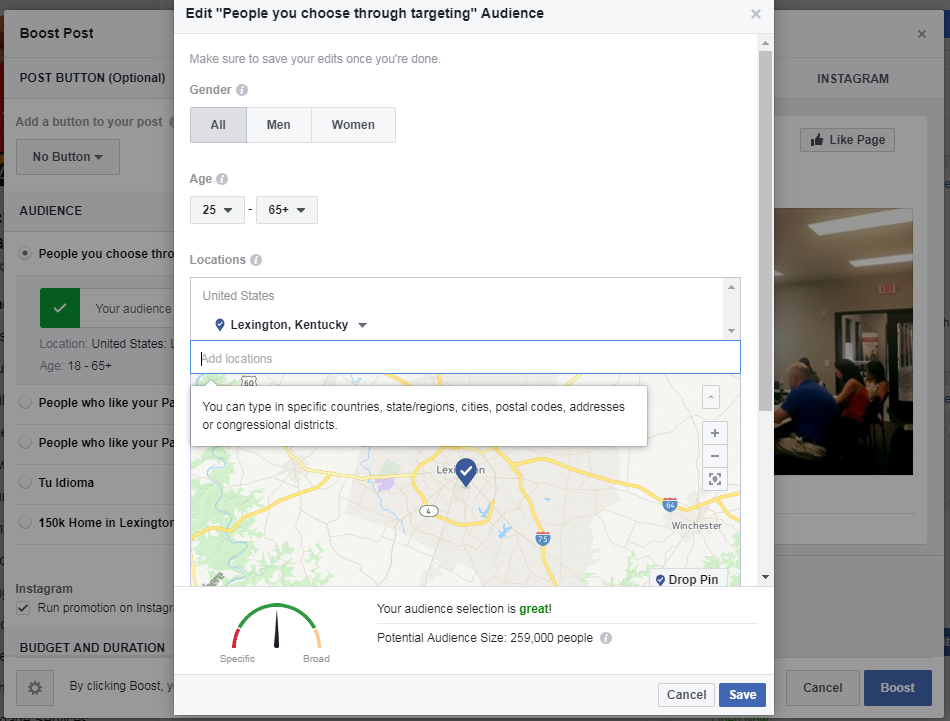 |
STEP 4b Specifying LocationYou can adjust the location in many ways for your ad. You can put in specific countries, states, regions, cities, postal codes, radius around street addresses, or congressional districts. You can also drop a pin anywhere on the map and have it select a radius. You can also exclude locations if there was an area within your defined location that you didn’t want included. When you add a location, there will be a small upside down triangle icon next to it. Click this icon to make further changes to your location like radius size. |
 |
STEP 4c ExampleHere’s an example of using a radius around an address. You will type the mailing address in and Facebook will offer a suggestion of the correct geolocated address. Click it and then you can adjust the radius surrounding the property from 1 mile to 50 miles. |
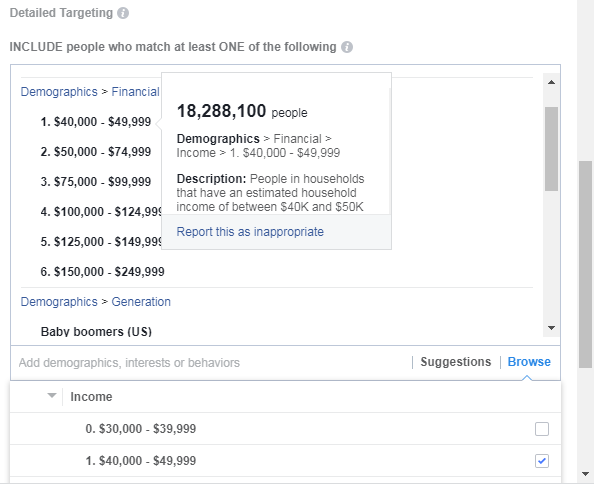 |
STEP 4d Narrowing Your Audience Using Detailed Targeting (optional)After you’ve determined gender, age, and location – you can narrow your audience further using detailed targeting: demographics, interests, and behaviors. This can help narrow your audience to users that would be more likely to engage with your post. Demographics include Income, household makeup, homeownership, etc. Interests include keywords or phrases that people show interest in like “horse racing” or “Keeneland Race Track.” Behaviors are personas created through a combination of demographics and interests – people meeting both a certain demographic and interest pattern may fall into a behavioral category of “Likely to Move.” Not everything is an item within detailed targeting, but there are thousands of combinations that can come close. You can see many of the categories with this infographic. |
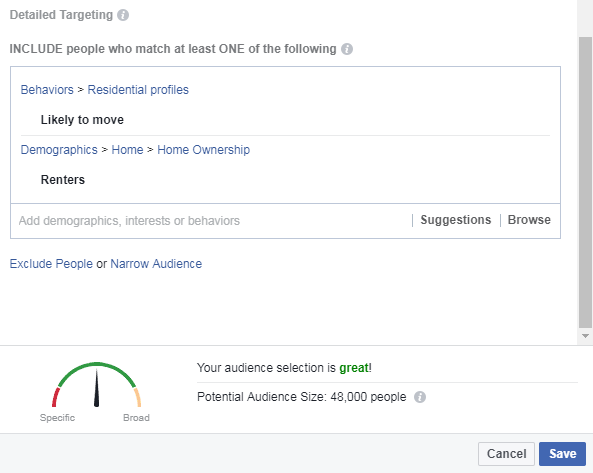 |
STEP 4e SampleA very easy combination that tends to help REALTORS® with boosting content is adding the behavior “Likely to Move” and/or the demographic “Renters.” You may want to try one or both of these targeting categories on your next boost and see if engagement increases! Your audience selection meter should always hover in the green range. Too specific, and your cost per impression will be very high. Too broad, and you won’t make a significant impact on your audience. Once you’ve set the audience the way you like, click SAVE to return to the rest of the Boosting menu. |
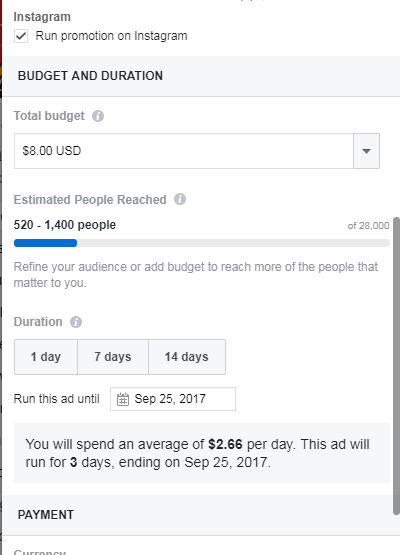 |
STEP 5a Setting Your BudgetNow that you’ve set your audience and hit save, it’s time to finish by selecting your budget. First, depending on the media in your boost (video, photo, link etc) you may have an option to run that advertisement on Instagram. You do NOT have to have an instagram account to advertise your boost on that network. Second, you can set the Total Budget of your boost. This is straightforward: ‘how much money do you want to spend total on boosting this post.” You name your price. You can select suggested amounts from the dropdown menu, or type in your own number. The gauge below will show the estimated reach of your boost. This is an estimate based on similar boosted posts targeting the audience you selected. It is not guaranteed, however, if the content is good – most users see that bottom number achieved easily. Then you can choose duration. It gives you easy buttons of 1 day, 7 days (one week), or 14 days (two weeks). But, you can also just select that date from the drop down field beneath those buttons. It will then give you a summary of your average daily cost and when the boost will end. |
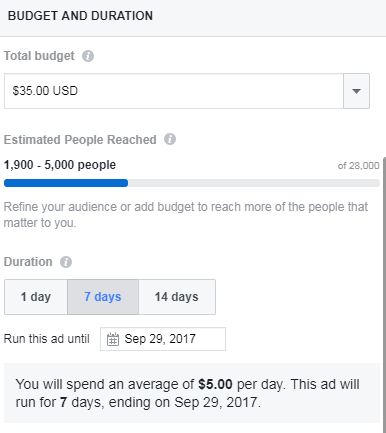 |
STEP 5b Using the Estimated Reach GaugeIn this example, you can see where when the total budget was increased, the estimated reach opportunity also grew. |
 |
STEP 6 Submitting Your BoostIf you have not already setup payments on facebook, it will prompt you to do so in the payment section. Facebook accepts credit/debit and paypal to pay for your advertisements. You are billed when the ad completes. Click the blue BOOST button to complete your ad! |
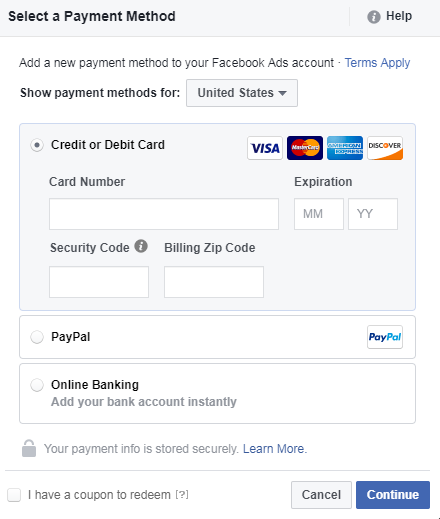 |
STEP 6b Setting Up a Payment MethodIf you haven’t setup facebook payments, this is an example of the screen to do it in. Paypal is the safest option of the three – a third party verified payment system that’s free to use. If you aren’t comfortable using paypal though, you can enter in your credit or debit card that you use for business expenses. Rector Hayden DOES NOT recommend using the Online Banking method where facebook stores your bank account information for withdrawals. Once you’ve entered in your info, click the blue CONTINUE button. |
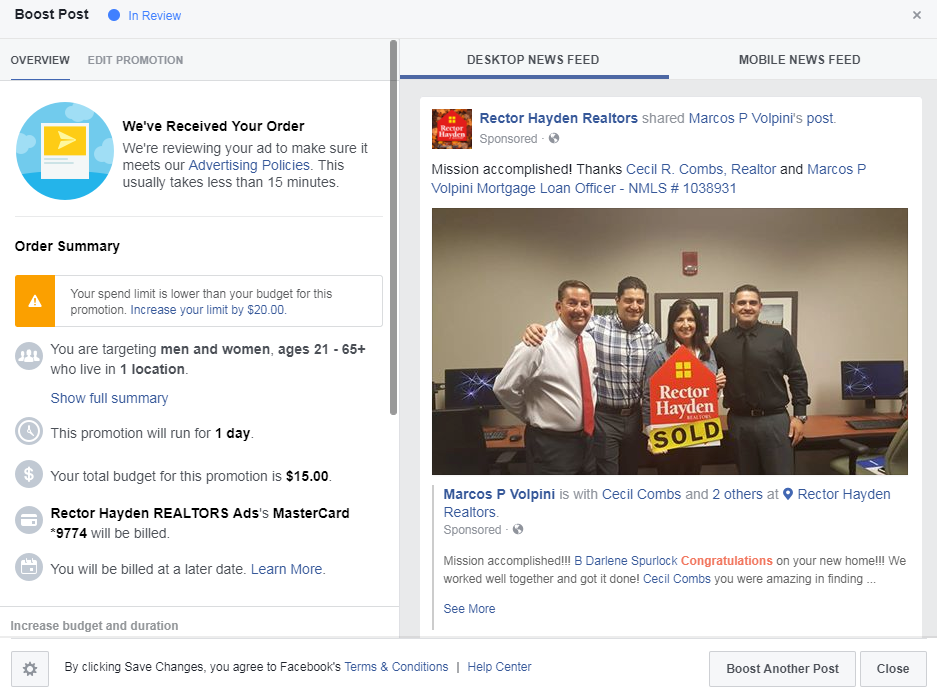 |
STEP 7 Confirm Your BoostAfter you clicked the blue BOOST button, completing your ad order – you’ll now see a popup with a summary and sample of your ad. From here you can go on to boost another post or close the window. Your boost must be reviewed by Facebook, and you’ll be notified via e-mail or notification when its approved (usually a matter of minutes). |
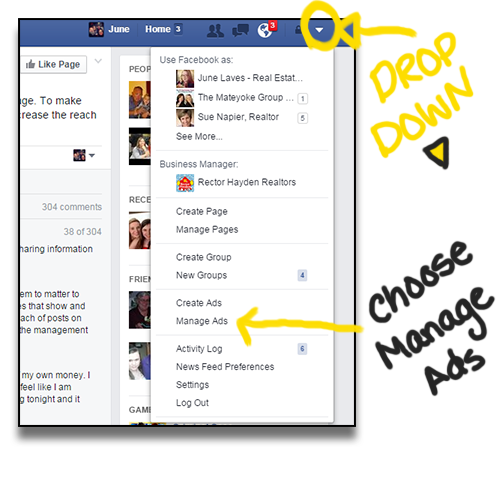
After you’ve successfully boosted your post, you can manage the ad – view data and analytics – or create similar ads by going to the Manage Ads Sections on Facebook.